Category Archives: Hiking

Ridiculously useful hiking guides including itineraries, packing, and other tips.

Walking The West Highland Way – 5 Days Itinerary

Walking the West Highland Way in 5 days

The West Highland Way is one of the best hikes in Scotland. Why? Because revellers trek through the rolling hills and by the calm lochs of the west coast of Scotland which is deemed to be one of the most beautiful areas in the country.

This 96-mile hike starts just outside of Scotland’s friendliest city, Glasgow at the town of Milngavie (pronounced Mill-guy) and ends at the outdoor capital, Fort William.

Walking the West Highland Way – 5 days is the most popular time frame however many visitors like to take longer, covering fewer miles in each day and spending more time in the towns, villages or campsites of the west coast.

This guide includes

  • The West Highland Way route(s)
  • Advice on accommodation
  • West Highland Way packing gear list

West Highland Way – 5 days Route

The longest day of the 5-day route is 22.5 miles with the shortest being the last (15 miles).

Refreshment stops and a variety of types of accommodation can be found in most areas.

There is no strict way of planning your West Highland Way hike but all routes begin in Milngavie.

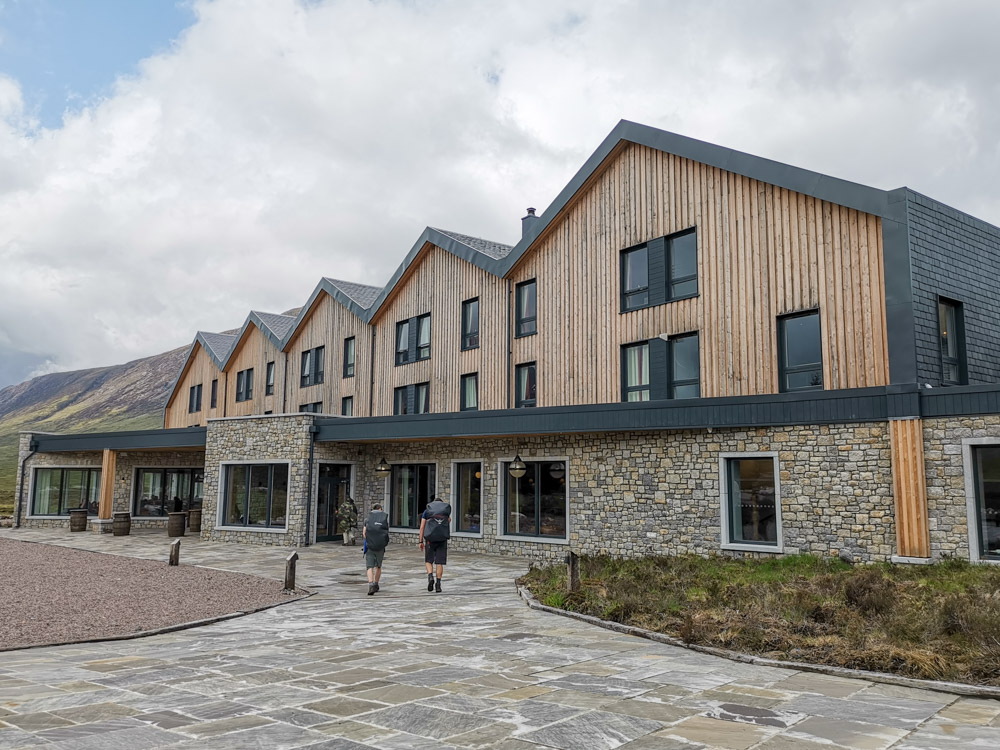
Kingshouse Hotel West Highland Way

Day 1: Milngavie To Balmaha (20 miles)

The first day is relatively easy.

The West Highland Way starting point takes places in Milngavie and is identified by a large cement monument on Douglas Street.

Next head through a small car park behind Milngavie’s town centre shops.  

The first stretch takes you along fields and farmland all the way to Dumgoyne where you can buy refreshments at The Beech Tree Inn and then on to Drymen for another refreshment or overnight stop.

The next stage is on to Conic Hill, which is a little trickier to find.

Conic Hill Balmaha in Loch Lomond path

Keep an eye out for the signposts (marked with the thistle) which take you through a forest then up and over Conic Hill with stunning views of Balmaha.

Alternatively, keep walking through the village to Rowardennan.

Personally, I found this leg relatively easy, hopes were high and the weather was dry!

Unfortunately, one member of our group could not go on at this stage and was picked up in Balmaha (she rejoined us at Bridge of Orchy).

We stayed at Bay Cottage and recommend it highly. There’s a hot tub and the breakfast is superb. 


Read more | Day 1 of the West Highland Way (blisters and Balmaha)


Conic Hill Balmaha Loch Lomond views

Day 2: Balmaha to Inverarnan (21.5 miles)

Leaving the beautiful town of Balmaha with Loch Lomond at your side, walk past the shores to Inversnaid with refreshments at Inversnaid Hotel.

Here a small passenger ferry runs to the opposite side of the loch for non-hikers.

Next, it’s on to Inverarnan, sleeping options are limited to a popular and pricey hotel so WHWers often opt for the town of Tyndrum which has more options such as Tyndrum Lodges or Beinglass campsite.

Read about WHW accommodation options in detail, here.


Read next | Day 2 boots, boats and automobiles


Balmaha West Highland Way Walk

Day 3: Bridge of Orchy to Kinlochleven (22.5 miles)

This is the longest day of the West Highland Way hike and if it is raining you really can suffer.

The first leg takes you through farmland and on to Strathfillan (refreshment stop/small shop) then easier terrain to Tyndrum for the famous touristic Green Welly Stop serves food and snacks.

Green Welly Tyndrum Scotland

Some Wayers may choose to stop here for the night to break the hike into 6 days.

Others may continue on to Bridge of Orchy which has one hotel and a couple of guest houses.

A bus from Glasgow runs to and from Bridge of Orchy. The village also has a train station.


Read more | The day of doom – Achilles pain ruins the day


Deer with one antler Kingshouse

Day 4: Bridge of Orchy to Kinlochleven (18.5 miles)

This day includes walking over Rannoch Moor which can be brutal if the weather is poor (no coverage) and then on to visit the friendly deer at Kings House (refreshment stop).

Kingshouse Hotel has a snug with pies and casual dining, indoor seating at its restaurant and outdoor pods for food and drinks.

It is quite pricy so save your pennies.

This is where our party stopped for the night as we completed the West Highland Way in 6 days.

However, if you choose to power through, head behind the King House Hotel to the Devil’s Staircase which is not as scary as it sounds!

Again, the weather can be against you at this leg.

The descent leads you into Kinlochleven which has a handful of restaurants, accommodation and a Co-op shop.

It really is cool getting to sleep in a valley for the night.


Read more | Out last day of the WHW


Rannoch Moor Scotland West Highland Way

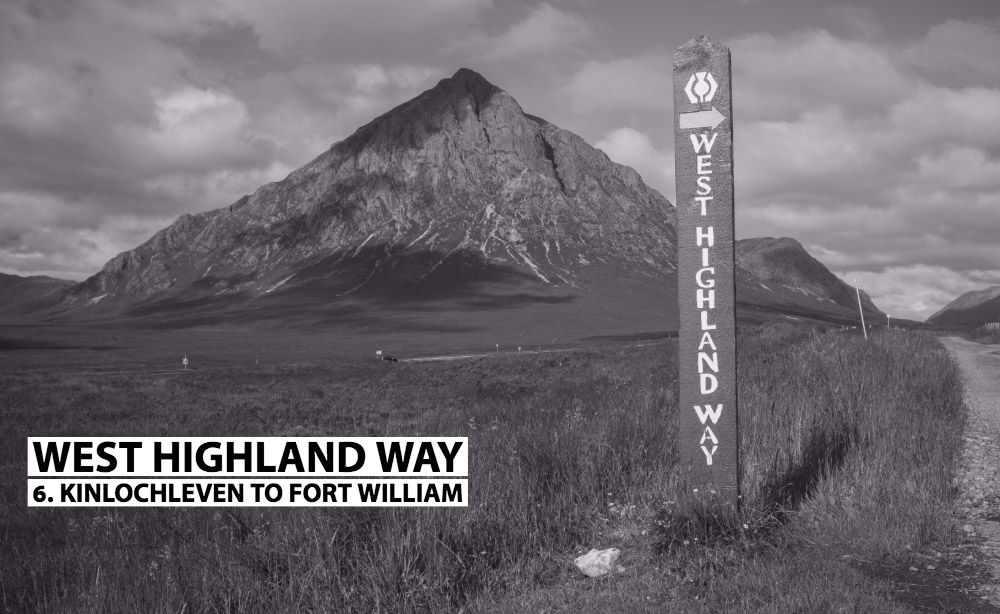
Day 5: Kinlochleven to Fort Willian (15 miles)

The final day starts with a tough climb which rewards you with views of the valley.

As you head towards Fort William, views of Ben Nevis become apparent. Will get to see the tip? It’s often hidden!

Some Wayers rest for the night in Fort William then tackle the UK’s highest mountain the next day. Will you?

End the Way with a picture of the man resting his feet.

Dine and have a celebratory drink at Tavern (try the skewers), The Volley Arms or The Crofter.

Pick up some pastries at Rain for breakfast the next day or snacks later.

West Highland Way Finish Fort William

Frequently Asked Questions About the West Highland Way

How long is the West Highland Way?

The hike is 96 miles starting at Milngavie and ends in Fort William.

What is the West Highland Way weather like?

You can expect four seasons in one day in Scotland. The west coast can be especially wet.

May tends to be one of the nicer months, April-October will be more pleasant that October-March.

Dark nights creep in around 4pm during winter.

Is the West Highland Way wild camping friendly?

Wild camping is legal in Scotland which is great for those looking to keep costs down.

Be sure to read the Scottish Outdoors Access Code for rules which include being respectful of locals and animals, picking your rubbish after you, not parking close to roads.

We talk extensively about this in our camping guide to the North Coast 500 (very popular road trip in Scotland).

Do I need to carry my own bag?

There are companies that help you transit with their West Highland Way baggage transfer options.

This means they collect in Milngavie and your bags arrive at your accommodation each day before you do (usually).

If you would prefer to carry your own bag, that’s perfectly fine.

Many hikers do. Just keep in mind that there is limited drying space in some of the accommodation and if you are camping there could be nothing available.

Invest in an Osprey bag cover US / UK to keep your belongings dry. 

Osprey Bag Cover

I’m a solo traveller, do I need to do the WHW myself?

We’re a social bunch in Scotland, why not join one of the many West Highland Way tours?

During the peak months, the route is like M9, busy!

There is a good chance you will meet fellow Wayers at each stop if you don’t want to commit to a tour.

Another option is to do a callout in one of the many Europe backpackers Facebook groups, a Scotland tips Facebook group or the specific West Highland Way support group.

These groups have developed into great wee communities for those looking for support and ideas.

How bad are the West Highland Way midges?

Argh, those blasted wee winged beasties can really ruin your holiday in Scotland.

From June – August we see the worst of the swarms. Purchase Avon Skin So Soft US / UK to ward them off.

What are your biggest West Highland Way tips?

Like all of my articles, I don’t hold back any information but in a nutshell, my biggest tips are

  • Break in your shoes/boots months before attempting the West Highland Way trail
  • Train – attempt as many 20-mile day hikes as you can. Aim for at least one two-day hike
  • Invest in a decent raincoat, I love my Marmot Precip US / UK
  • Pack flip-flops for the evenings to give your feet some breathing space
  • Biofreeze US / UK is excellent for aches and pains
  • Have fun but don’t be ashamed if you have to admit defeat at any stage. Bridge of Orchy is a good place to sit out as you can catch the bus to Kings House and start again

Here’s our lightweight hiking book comparison guide


Salomon Quest Ladies Boots

West Highland Way Accommodation

There is every type of accommodation along the West Highland Way which makes the trek very inclusive of all budgets.

Wild camping keeps costs down and campsites throughout the route offer basic facilities.

Hostels with drying rooms and kitchens can be booked at Balmaha, Tyndrum, Bridge of Orchy, Kingshouse and Kinlochleven.

Bed and breakfast guest houses are very popular in Scotland and found at each stop of the Way.

Most of these bed and breakfasts offer packed lunch service too.

Staying in B&B is a really pleasant way to do the WHW as you get to meet locals and enjoy a hearty breakfast before you trek again.

Hotels are also available throughout, naturally, these are pricier than the alternatives mentioned here.


Read more | Where we stayed on the West Highland Way


Kingshouse Bunkhouse West Highland Way


West Highland Way: What to pack

Your packing list will depend on whether you are carrying your own bags or using a transfer company. Essentials include

  • Well worn-in walking boots. I wear Salomon Quest boots US / UK
  • Hiking socks
  • A good quality waterproof coat, I wear Mountain Equipment Rupal jacket US / UK which is thicker than my Marmot which is great for dryer weather, small showers 
  • Icebreaker Merino wool base layer USA / UK
  • Waterproof overtrousers USA / UK
  • Day bag with snacks and water
  • Walking sticks (optional, saved me on day three)

You may also like | Our full WHW packing list


Hiking shoes | road trip packing essentials

Final Words

This West Highland Way route planner can be adapted to meet the needs of any hiker.

If you plan to bring your dog remember to check where lambing season is taking place as you won’t be able to walk through that area and keep your pup on the lead as they do double the number of miles that we do which can blister their paws.

Save for later! Pin to your Scotland board

The West Highland Way hiking guide that includes tips on routes, where to stay, what to pack and frequently asked questions about Scotland's most popular hiking trail.

Any questions? Ask in the comments below.

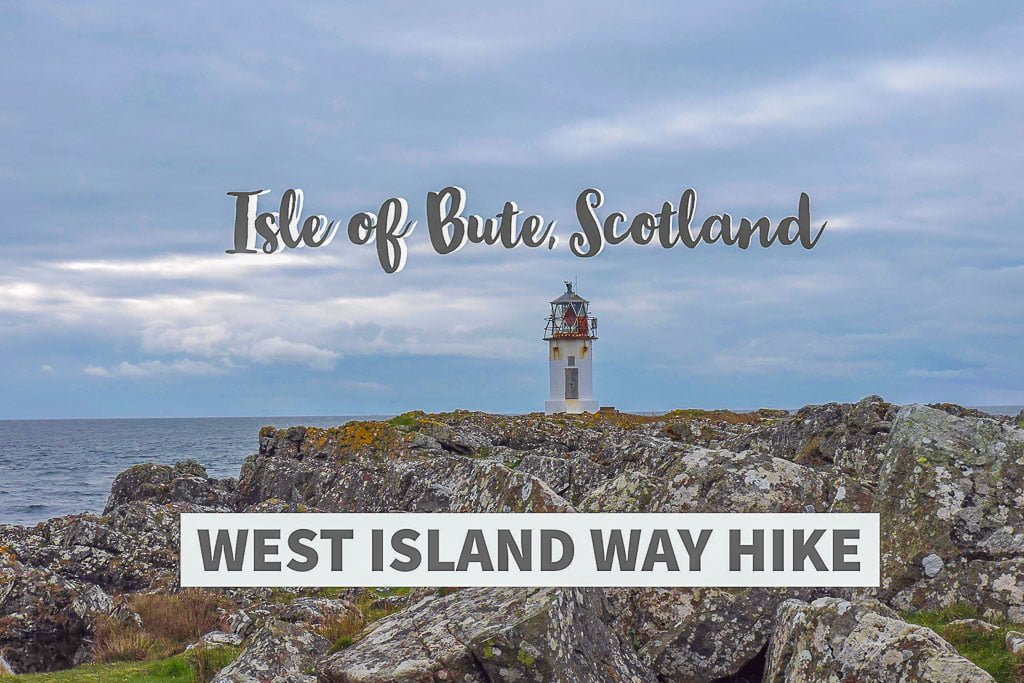
West Island Way: How to + Things to do in Bute

West Island Way Hike | Isle of Bute Scotland

After the success of trekking the 96 miles of the West Highland Way in Scotland (ok, there was that one blip) we (Gemma and friends, Gordon and Laura) decided to embrace the long May Day weekend and head to the striking west coast island of Bute to tackle the supposed 25 mile/40km (whoever wrote the guidebook could not count, add another 8km!) West Island Way. Passing roaring waves, friendly seals, unsuspecting cows and very few fellow ramblers, we enjoyed glorious dry weather for the most part of this Scottish hike, as well as a few too many vodkas in the capital, Rothesay, on the Saturday night! Here’s our guide for walking the West Island Way in two days (very doable), how to get there, the costs, and things to do in Bute along the way. Buteful!

West Island Way Walking Route

As we wanted to complete the West Island Way over two days, we decided to stray off the suggested route slightly, finishing day one back in Rothesay and spending the Saturday night in Bute’s capital. We then started day two at the top of Rothesay where we finished on day one.

Day 1: Kilchattan Bay – Rothesay

  • Approximately – 26km/16 miles + 35,603 steps (using phones for data)
  • Time – 7.5 hours (lunch + 2 snack/scenery stops)
  • Terrain: Coastal path, farmlands, one hill (optional)
  • Accommodation: the Boat House B&B, Rothesay
Love Scotland? Check out our Scotland gift guide

Stage 1: Kilchattan Bay Circular Walk

(3 hours with lunch and snack/scenery stops | 8km/5m)

The south of the Isle of Bute is by far the most scenic stage of the West Island Way; it takes you along the coast, past Little Crumbia, Rubh’an Eun Lighthouse and on a good day, views of Arran in the distance. There is also a ruin which doubles up as a snack stop, though you need to take your own!

Signposts West Island Way | Isle of ButeWest Island Way Signpost

A. Take the bus from Rothesay to Kilchattan Bay (for times see here or send them an email – very speedy response). If you are as lucky as us your driver will be Paul who doubles up as a tour guide for the journey (£2.90 single adult)! The bus stop is at Rothesay Guildford Square which is in front of the ferry terminal (heading towards the direction of the Boat House B&B).

B. From here you will see a map of the West Island Way along with various other walks and a signpost highlighting the start of the West Island Way. Walk towards the water with the road to your back, passing through one of many gates. From here follow the path along the coast and past a shelter-like cave (take note for if it’s raining and you decide to wait on the bus back!).

On the left you will see Little Cumbrae during this stage of the trek as well as the picturesque Rubh’an Eun Lighthouse. The West Island Way continues to the right (follow the designated wooden signposts with the white stripe) to GlenCallum Bay.

Rubhan Eun Lighthouse Isle of Bute West Island Way-9

Rubh’an Eun Lighthouse

C. This is where we made a slight wrong move. We headed straight across the beach to the very far left-hand corner of the coast, it will quickly become apparent that there is nowhere for you go without some scrambling which you do not have to do on this easy walk. Merge to the right after the Bay up a slight hill, moving away from the shore (and not to it like us).

The path will take you to the left and through a narrow pass which blocks out the wind (a strange feeling). We took a path to the right, slightly off course to avoid the families of cows. Beware, this area can be muddy.

GlenCallum Bay West Island Way Isle of Bute
GlenCallum Bay

D. Follow the signs for St Blane’s Chapel to the left, if you have followed our path to avoid the cows you will want to veer back to the correct path so you do not miss the ruins of St Blane’s of Kingarth (a historic village). We stopped for a ten-minute break here.

St Blains West Island Way | Isle of Bute

E. Head to the far left corner of the field, we ducked under a fence at the end of this short stretch (St Blane’s should be behind you to the left if you are facing the fence), then walk straight ahead.

F. Hike down the farmlands with the Suidhe Chatain hill in front of you. It is well worth storing a bit of energy to get you up Suidhe Chatain for rewarding 360 views of the Isle of Bute. The other two opted for sitting and waiting on me at the bottom of the hill, can’t believe they missed the photo op!

Head back down the hill, take a sharp left after the homemade step then left again joining the non-hillwalkers route (or alternatively do not climb Suidhe Chatain, take a right before the ascent, through a gate and walk downhill with the hill on your left).

You will walk towards some houses, taking the exit into the woods on your left and then past more houses and through a lane to Kilchattan Bay. If you would prefer to continue walking, follow the WIW signposts behind the lane of houses which continue through the wooded area.

Suidhe Chatain West Island Way | Isle of Bute

Views from Suidhe Chatain West Island Way | Isle of Bute
Worth the hike: views from Suidhe Chatain

Kilchattan Bay

This is where we stopped to eat our packed lunches. There is an area with benches and a free toilet signposted by international flags. There is a small shop in Kilchattan Bay which sells soup, sandwiches and drinks. This is to the right of the picnic area by the water if facing the houses. The Kilchattan Bay Circular is one of the shorter standalone Isle of Bute walks as there is the option of getting the public bus back to Rothesay, or to continue on with the West Island Way.

Stage 2: Kilchattan Bay – Rothesay

A. Facing the houses with the picnic area/water to your back head right walking past the houses, the small shop and towards the Post Office. Just before the last house turn left, there is a WIW signpost tucked up this path. You will rejoin the wooded area path and if you are lucky will come across a tree swing (did you see Gordon on our Instagram Stories?

I was too short to jump on the stick seat!) At the end of the woods walk across the road into the fields via the kissing gate following the path along the fence and through the farm passing a bright orange windsock towards Bute Golf Course.

B. Watch out for any balls flying at your face (Clueless reference for 90s kids) as you walk straight through Bute Golf Course towards Stravanan Bay, one of the many beaches on Bute, taking a right. Here you will see views of the Isle of Arran (is that Arran? Yes!) The beach stage ends when you see a farm (and a car stuck in some sand, they’ll probably still be there trying to dig themselves out), take the right (there was no bridge as indicated in our West Island Way guide) walking past the farmhouse and onto the road.

Turn right and walk along the road, aiming to take a left after a dip in the road.

C. This right turn could easily be missed so pay attention for the WIW signpost. This path continues through trees and farmland then uphill. Here there are spectacular views of Bute and beyond and also a bench for a rest. This stage of the West Island Way is very open so will be brutal in a downpour. We got lucky!

West Island Way | Isle of Bute
Walking Scotland in style

D. The path continues through farmlands, eventually taking you down with Rothesay in the distance on your right and a farmhouse on your left. You want to take the left, walking diagonally across the farm, towards the farmhouse which you walk through (sorry owners!) coming out at Loch Fad. We were fading at this stage so blasted the 90s tunes through the JPL Clip portable speaker to raise the spirits.

Loch Fad West Island Way | Isle of Bute
Loch Fad

E. Following the path to the right through the trees and farms you will come to the outskirts of the town of Rothesay where we end day one of the West Island Way. Head down Barone Road (mentally noting number 99, this is where you kick off the walk tomorrow) to the centre of town.

Day 2: Rothesay – Rhubodach/Port Bannatyne

  • Approximately – 24km/15 miles + 33,193 steps (using phones for data)
  • Time – 5.5 hours (lunch stop 20 mins)
  • Terrain: Designated paths by a road, farmlands (mostly farmlands)

A. Make your way back to 99 Barone Road (there a West Island Way signpost across the road pointing towards the lane next to 99) and walk along the path. Today is mostly farmlands and will be very muddy if raining. Walk across the field, diagonally, all the way to the end (farmhouse) and walk through the gates then into another greenery area that goes downhill. Take a left when you are facing the old school building, keeping right before you get to Westland Farm.

B. Go through the gate and take a sharp left and go through more gates then left again. Our West Island Way guide indicates that a forest of pine trees is on your right, however, this is no longer the case, do ignore that path coming in from the right though. Walk down the hill until you approach a minor road.

Here you can end the walk at Port Bannatyne (if making this your destination on day one, or if you decide that you had too many drinks at the Scottish Honky Tonk the night before!) Up to here takes around 35 minutes.

Kames Bay West Island Way | Isle of Bute

C. With the water and boats at Kames Bay on your right (in the distance through a fence) walk along the path into the wooded area. 

D. Here is where it gets a little confusing. The West Island Way (and other Bute walks) paths look like they’ve had a little love. From the end of the woodland area path take a left (the WIW signpost pointing to Ettrick Bay is hidden) and join the designated walking path called the ‘Tramway’. You will pass the derelict St Colmac’s Church on your right and the Kyle of Bute will be in front in the distance. This stage takes around 30 minutes

E. Before Ettrick Bay, there is a signpost for the WIW which points inland across a road and to a single track surrounded by farmlands. Take this turning – be warned, this is where it gets monotonous. If you are not feeling it/it is raining I would strongly recommend not carrying on as the remainder of the West Island Way consists of walking through farmlands until you reach Rhubodach (Gordon wishes we had never turned right…)

F. OK so you have decided to carry on, the weather must be nice, walk past Lower Ettrick Livery Farm on your left and passed Upper Ettrick Farm following the straight path until it becomes faint (30 min). Keep Glenmore Farm on your right, go through the gate and keep walking through the farms. Parts of this stretch are muddy, even with two days of dry weather.

G. Cross a small stream/trickle of water and head up the hill, you will see signposts in the distance.

H. Head up the hill following the two WIW signposts which end at a fence (not a gate as indicated by our guide) climb over into the wooded area for a change of scenery (praise be!) Glenmore Farm (stage F) to here takes around two hours with a 15-minute lunch.

I. Continue through the woodland path, passing a lookout on your right, ignoring the walk for Sight Hill (no, not the Glasgow one), until you head downhill to a West Island Way signpost indicating left for Rhubodach or right for Port Bannatyne (our printed guide suggests that this path to the port is not great).

J. Walk downhill towards the beautiful port of Rhubodach then on to Port Bannatyne (the official end to the West Island Way) if you so wish. We called a taxi to take us back to Rothesay so we could make the tea time ferry back to Glasgow (£20)

You may also like – North Coast 500, Scotland’s most scenic drive

West Island Way Map

Unfortunately, there was little in the way of WIW maps online that were clear to the untrained eye (see here). Our hosts recommended popping into the Isle of Bute Discovery Centre (Visit Scotland Information Centre) close to the Rothesay ferry terminal, however, it was closed by the time we had docked.

The West Island Way is very well signposted and with this guide (copy and paste to your notes or email or Google docs to avoid losing phone signal) I’m confident you will be ready to loch and load!

West Island Way Packing Guide

Like many long-distance walks in Scotland, one of the hardest things about the trek is packing for rain, wind, and shine! Here’s a quick guide on what to packing for the West Island Way (and other Scottish hikes). From the feet up…

  • Well worn walking boots (vital)
  • Walking socks x2 Laura recommends Dexshell waterproof socks
  • Tape (I use Leukotape, it does not budge!) for blister prevention
  • Vaseline/ petroleum jelly for feet lubrication
  • Walking trousers x1
  • Underwear (pants/knickers/boxers) x2 or 3
  • Merino wool (or breathable) top x1 (or 2 personal preference)
  • Downer coat + rain jacket (Gordon and I both wore North Face)
  • Gloves (I did not need these and I’m usually very cold)
  • Hat (Laura confirms day 2 was better with a hat)
  • Sunglasses

Daypack/ Day Bag

  • Clean socks
  • Snacks
  • Lunch (nowhere to buy food on day two)
  • Water in a fillable bottle
  • Camera
  • First Aid Kit
  • Phones
  • Anker phone battery pack US / UK
  • Plastic zip food bag for phone if raining and you want to keep it in pocket
  • This printed guide
  • Sunglasses (never sacrifice style for summits!)
  • Money
  • Waterproof trousers
  • Suntan lotion
    West Island Way | Isle of Bute Scottish Walks

Night Gear

Rothesay is a small town with quite a few pubs and restaurants. You can dress up or down, there’s an eclectic mix of patrons.

  • Leggings
  • Tops x 2
  • Cardigan
  • Flipflops (Laura wore Doc Martens, Gordon had trainers, I like to give my feet a rest!)

Things to do in Bute

  • The first thing people mention when you say you are going to the Isle of Bute is – are you going to Mount Stuart House. This 19th-century mansion boasts of gardens and art exhibitions. Private tours are available. Entry fees range from £6.50 – £11.5
  • There are many smaller walks on the Isle of Bute ranging from 2.5 to 6 miles 
  • Canada Hill viewpoint is a short Rothesay walk which offers lovely views to the Firth of the Clyde
  • Eat! There are lots of nice places to eat in Bute. We had a sit-down chippy at the West End Cafe (£23 for 3 meals  +soft drink) and fish at Harry Haw’s (£47 for 3 + drinks)
  • Party! As soon as we heard that there was a Scottish Honky Tonk that played live music we booked a taxi (£6) there, drank the monster cocktail (£20) then taxied back to join the rest of the island in a sing-song at the Palace Bar. Just a few of the pubs in Rothesay

I cannot stress how close the Isle of Bute is from the city which makes it a perfect Glasgow day trip if you would like to mix a bit of city culture with the west coast of Scotland’s outdoors and nature.

Where we stayed on Bute

There are over thirty Rothesay hotels and guest houses which vary in quality, price and services offered. We stayed with Sara and Paul (excellent communication and very friendly hosts) at the Boat House B&B which is a feast for the eyes as well as the belly! Each of the Boat House’s five super suites has sea-views and an extensive continental breakfast selection of cereals, muesli, bread, butter, jam, marmalade, orange juice, teas, coffee and milk.

Boat House Bute | Isle of Bute

Another bonus of the Boat House is that it is a 5 minute (if that) walk from the ferry. This is how close this Isle of Bute accommodation is to the port. The Boat House, Bute also has a one-bedroom self-catering flat named ‘The Nook’ for those looking to cook in (there are decent restaurants on the Isle of Bute for those who don’t).

Our super modern Mega Suite was made up of two bedrooms, a kitchen (miss eating breakfast while watching the local dog walkers and ferries go by already), a living room with TV, and a very plush bathroom kitted out with a bath (yes, I used this after day one of the hike, would have been rude not to!)

Although the Boat House has five rooms it is secured by a telecom at the front door, key access to each apartment and the owners live on site. Oh, and our suite had adjustable heating which is important for when the adrenaline drops after the day one West Island Way hike (nothing some heat, a bath, and a glass of fizz won’t solve).

Boathouse Supersuites Rothesay | Isle of Bute

How to get to the Isle of Bute

One of the most attractive features of the West Island Way walk is how accessible this Scottish hike is. Unlike many of the treks up north and in the Highlands (for example, Isle of Skye walks) you do not need to have a car. You don’t even have to join a walking group or tour as the public transport system is so well connected (this really is not the case everywhere in Scotland, ‘Sunday service’ is a way of life for many bus routes!)

Glasgow to Wemyss Bay (‘Weems’)

There is a train link between Glasgow Central station in Scotland’s largest (and best in my opinion) city and Wemyss Bay which takes less than one hour. If you are coming from Edinburgh (Scotland’s capital) there is a train link between the two cities (and don’t forget to check out my advice on things to do in Edinburgh).

From Wemyss Bay, you take the Caledonian MacBrayne Ltd Island of Bute ferry which is very comfortable with indoor and outdoor seating for those who want to see Bute before they dock (or wave goodbye to Wemyss Bay). There’s even a section for dogs (move away from the puppies Gordon).

The ferry ride takes 35 minutes. You can purchase a ticket which takes you from Glasgow Central (by train) to Rothesay (by ferry) for £19 return. For times check out the Trainline website (from Glasgow Central to Rothesay). Wemyss Bay ferry parking is available but it is limited to 100 spaces and there is a charge (you can find free parking in the town if you are happy to walk a short distance) or you can take your car on the ferry at an additional cost.

The Gourock to Rothesay ferry still requires passengers to take the train to Wemyss Bay (the journey takes over one hour).

So now you know how to get there, where to stay, what to eat, where to party, and how to walk the walk – what’s stopping you? The Isle of Bute is close to Glasgow there really is no excuse not to visit this coastal haven of beaches, boats, and banterful bus drivers. Oh good news readers, there’s now a West Island Way website!

Like it?
Pin it!

West Island Way | Hiking in Scotland

Have you been to Bute?

Ask us any questions in the comments below.


Disclaimer: Thanks to the Boat House B&B for hosting us (an honest review as always, check TripAdvisor to compare) and Walk Highlands for their guide which we’ve updated in this West Island Way review.


Lares Trek to Machu Picchu – Is This Peruvian Hike For You?

Lares trek to Machu Picchu

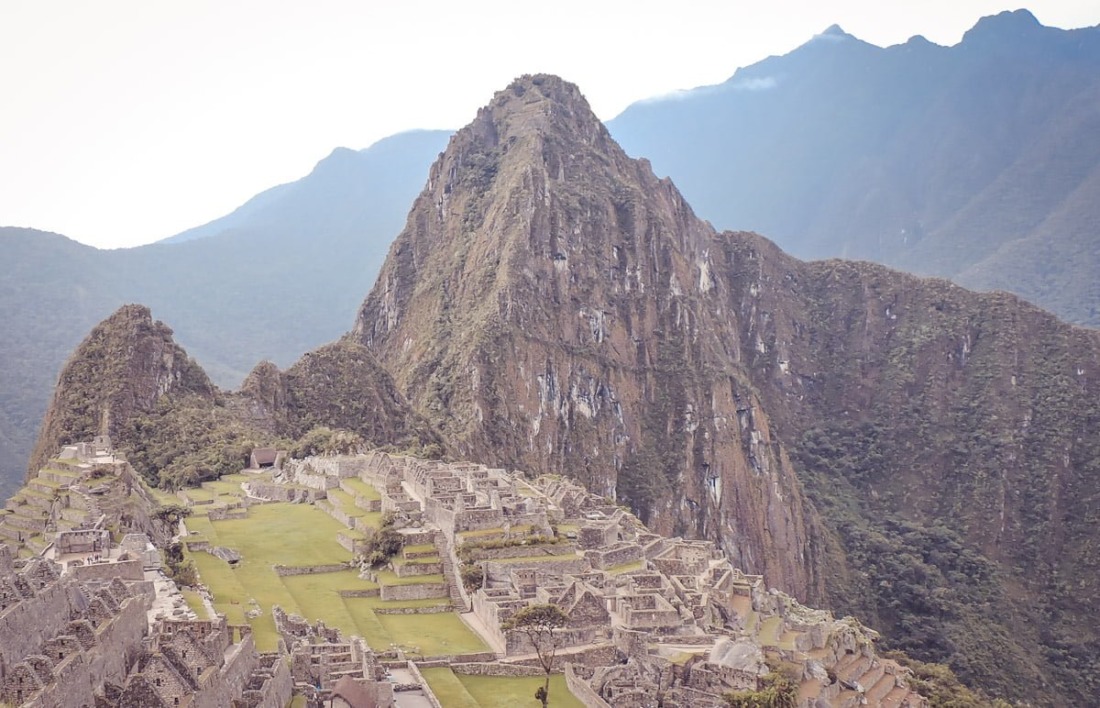
The Lares Trek to Machu Picchu is one of the alternative hiking routes to the famous Inca Trail to Machu Picchu. The Inca Trail actually books up at least six months in advance and only a certain amount of passes are available each day, therefore, the Lares is a great alternative for those who are less committed to a trek date (like ourselves, Gemma and Craig). Hikers still experience hiking through Peruvian rural villages, camping at high altitude and a day at Machu Picchu with the Lares trail. The Lares and the Inca are just two ways to get to this modern wonder, in fact, there are at least 14 ways which you can read about in this extensive guide (trains, treks and tours).

Lares Trek, Peru

The Lares Trek is appealing because it is a short multi-day hike (4 days/3 nights) with only two nights camping and the third night in an Aguas Calientes/Machu Picchu Pueblo hotel. Guys, it gets really cold camping in rural Peru!

The route consists of trekking through valleys, mountains, tropical forests, up and down hills, past lakes, waterfalls and towns. Day two is the hardest, although this is not unique to the Lares trail, day two is tough on all Machu Picchu treks.

Initially, we planned to sign up for the Salkantay Trek but decided to do the Lares Trek instead because we would have been the only two people on the trip and I feared that we would throw each other off the Andes if that were the case. We were not disappointed with our change of plan.

Lares Trek Peru

Before You Trek to Machu Picchu – Altitude

Arrive in Cusco (there are flights from Lima and buses from other destinations such as Arequipa) at least two days before your trek to acclimatise. Do not take this warning lightly.

One member of our team was very sick with altitude sickness; she ended up with two days of flu/hangover-like symptoms and trekking via donkey taxi on day two. Her friend was fine so it impacts everyone differently.

With the Lares Trek, the highest point is 4650m (15255ft) ABOVE SEA LEVEL and it is horrendous! (Craig enjoyed it, weirdo). But then you see a ‘bonito’ (beautiful) lake so, like childbirth, I assume, you swiftly forget the pain. Question your fitness. You will be in a group of mixed abilities and the trek is tough.

Machu Picchu Trek Travel Insurance

Research this question: does your travel insurance company cover you at this altitude? Many others did not insure above 3000m and the treks to Machu Picchu will hit above this.

We chose True Traveller because they did insure hiking at this altitude. I actually had to claim in Vancouver (not related to high altitude or hiking!)

I had ear crystals which were making me dizzy every time I stood up. True Traveller paid out, fast. Their communication is also very efficient. Check out the best rates for your trip here.

Many people buy coca leaves to chew. Not only is it legal, but it’s also recommended to help oxygen hit the blood and prevent altitude sickness.

Just remember the activator ash to go with it. We didn’t chew any but drank a lot of coca tea (best served with a spoonful of ‘azucarar’ sugar) and opted for coca sweets bought from the supermarket for a boost while at the high heights.

Ollantaytambo Peru Lares Trek_

Choosing a Company to Trek Machu Picchu

Two different travellers recommended Alpaca Expeditions to us. They both agreed with their ethical stance on paying porters a good wage, cheaper companies pay very poorly.

We had five glamorous assistants – a cowboy for the horses, two porters, a waiter (with a dicky bow tie outfit!), and a commis chef, plus the head chef. We were advised that the team were very professional and the food was outstanding.

I used the ‘chat’ function on the website and discussed our options with Bonnie, I got good vibes. However, regardless of paying a fair wage, we were still hit by a really awkward tipping situation at the end of the trek, read below to find out more.

How Much Do Machu Picchu Treks Cost?

Your trek to Machu Picchu will most likely be your biggest outlay during your Peru trip. Regardless of the advertised price (around $575/£412-$906/£650), there are other things to consider.

Firstly, to hold your place on the trek you must pay a deposit through PayPal and annoyingly there was a 5.5% charge on top of this, each! Secondly, although the remaining balance can be paid in full on arrival, in Cusco (where hikes leave) the ATMs only let you take out $200 per day.

We arrived in Cusco two days before we trekked so we had to split payment via cash and Visa card. A third hit is yet another 5.5% charge for using Visa. Infuriating for those on long-term travel trips like us.

Additional Optional Costs

Companies recognise that your trek is not the sole purpose of travelling to Peru so offer additional gear to make your hike more comfortable. You can hire walking sticks for around $15/£10, a sleeping bag for $20/£14 and an air mattress $15 (a camping mat is usually supplied). Thanks to Alpaca Expeditions for throwing these in free to cover this honest review.

Our sleeping bag was by North Face and creates a cosy cocoon! Along with the hot water bottle (this was a nice surprise for some of the team) and the llama wool blanket, I was snug as a bug. I would recommend the airbed but I never camp without one, I’m such a sleep snob.

The Hidden Cost of Machu Picchu Treks

The Alpaca Expeditions website and information sheet state that tipping your team is ‘100% voluntary.’

However, this is not true. We had a very awkward exchange after our last lunch with our (otherwise excellent) guide as we attempted to hand over our collective tip, he stated that this was only the ‘minimum recommendation’ and we could pay more. Alpaca recommend 60 soles per porter (£13), we assumed the commis chef was in this category and 150 soles (£33) for the chef (the food is immense).

This worked out at 65 soles (£14) per person. This put one couple over budget so they put in 30 soles less. The guide’s dissatisfaction put a bit of a downer on the lunch for a while.

Another member of the group later added more money to the pot. I think it needs to be made much clearer to travellers on a tight budget that the tip is expected so they can factor in this cost. If the suggested amount isn’t enough, a higher amount must be made clear.

I also feel the suggested collective tip isn’t a good idea because all travellers have a different budget and affordability varies. It was unfair on the nominated member of our group who had to take the flak whilst handing over our “voluntary” gratuity.

Craig believes there is a misconception that travellers are all very wealthy when in reality we all work hard (two years in our case) to pay for the trip. He thinks this stereotype needs to be tackled.

I’ve heard from friends who did the Inca Trail with another company that they suffered the same tipping situation.

We took part in the three days/two night Colca Canyon trek and there was no discussion on tipping (in writing or verbally) so the same can’t be said for all Peru treks just the Machu Picchu hiking tours.

The briefing: Lares Trek to Machu Picchu

6pm, the night before our trek, at Alpaca Expeditions headquarters we met with our guide, Sibi (Savy) and our companions for the next four days.

Sibi mapped out the plan and gave us advice on what to bring (pack your swimwear in your day bag for the baths!) Unpleasantly, he mentioned the ‘tipping’ recommendations that we had read about on the information sheet so already the expectation was becoming clear.

We were given a duffel bag and plastic bags to pack our clothes in along with a day bag cover and poncho, both of which became essentials.

I highly recommend taking a good quality foldaway coat like my Marmot Precip US / UK as it rains, a lot.

A down, puffy coat like my Rab Alpine USA / UK is also a good idea for the colder nights.

You can pick up a hat at the market in Cusco before you hike.

Day 1: Cusco – Lares Hot Springs – Cuncani

Bleary-eyed, Sibi and the Alpaca crew picked us up from Kokopelli at 04:45. He gave us a llama wool blanket and told us to sleep. With one market stop (where you can buy snacks and toys to give to the local children at your campsite on day one) we arrived at Lares Hot Springs.

The Alpaca staff, all dressed in impressive ‘green machine’ uniforms set up a breakfast fit for a king, served in a tent. We ate bread with jam and butter as well as eggs and drank hot drinks.

We were also given snacks (a chocolate bar and banana) for the morning trek. Some of us went for a post-breakfast dip, the water was gorgeous (and not the hottest of the many pools), and then set off for our day one of trekking at 10am at 3100m above sea level.

Personally, Craig and I found the day one trail a doddle. The weather was dreary, the ponchos were useful but, for us, the waiting in the rain for some of the group to catch up was a challenge. The only other issue you may encounter at this stage is down to poorly worn-in walking boots.

For any hike abroad, don’t let poor footwear choice let you down or forget to get the shoes moulded to your feet before you go!

I actually hike in Salomon trek shoes US / UK which are great for packing as they are lighter than boots. 

after a previous hiking trip killing my Achilles heels.

I always pack Leukotape US / UK for my ankles too – cheap and stops blisters happening. Read more on our trek footwear choices.

The day picked up when we arrived for lunch. The Green Machine clapped on our arrival and we couldn’t believe the setup.

A toilet (yes!) tent, our dining room tent, a plastic mat for our bags and soap with water bowls for us to wash our hands. Lunch always consisted of soups, bread, meats and veg.

At every meal, we were spoiled by content and presentation. Although the porter boil the water for consumption during meals, it’s wise to carry a filter bottle like this Water To Go [quote TSA15 at checkout for 15% off] one.

Couple wearing ponchos Lares Trek

The afternoon trek concluded with meeting some of the local children. Sibi was like the ‘pan’ (bread) man; kids came running in their colourful dresses and ponchos to see what was on offer. Some of the group brought them gifts too.

Our arrival at camp was even more impressive than lunch, in addition to the toilet and dining room tent, our night tents were all set up with the mats, sleeping bags and blankets.

Our duffel bags were all laid out for collection too. We snacked on popcorn, empanada (llama cheese ones, delicioso!) and hot drinks then we were called outside.

You might want to consider packing some flipflops like Havainas to rest your feet at the camp.

About thirty of the local kids were sitting in the field (the land actually belongs to one of the porters) being served hot chocolate and bread.

Some snatched, some showed gratitude, usual kid behaviour. One of the little characters saw that a traveller was handing out presents. She conversed with Sibi who gave her another piece of bread but she was not happy with that. She wanted toys!

Then they all skipped off home to share the excess hot chocolate with their siblings and parents. It was refreshing to hear that they all go to school here. At night we dined on a platter of everything.

Sibi told us the plan for day two and we were in bed by 9pm (with a hot water bottle – The Green Machine treated us embarrassingly well).

Day 2: Huacawasi – Condor Pass – Quenayoc

The ascent! We trekked from 7am (wake up call with coca tea 5am then breakfast fit for kings again, PANCAKES) until 11am with ease. The ponchos were on and off then on again.

The horse collected one of the team members who was suffering horrific altitude sickness (she felt like she was being forced to walk with the worst hangover or flu), none of Sibi’s magic potions or lotions could lift the pain.

The horse was in demand! It also collected a second member to help her along the way. The remaining five were feeling smug – we’d made it to the top.

We found a rucksack with an Alpaca cover on it, must be a signal that we had made it? How wrong we were!

The next 35 minutes were horrible. We began the true ascent. Craig ran up (as usual), I felt like I was walking in space. I couldn’t take more than two steps without the feeling that my breath was being stolen from me. It didn’t help that it was so misty, another teammate, Steph, said she thought she was going to meet her maker! Sibi encouraged us all the way.

Then it began to snow. Luckily we had made it to the top where we were unexpectedly greeted with coca tea and a cheese sandwich by one of the porters.

Hero!

Do you like a challenge?  Check out this guide to the Inca Jungle trek to Machu Picchu.

Once we’d regrouped we began the descent, all the hard work was worth it because our next lunch stop looked like this…

Lares Trail Peru

One of the group lost colour and looked faint. Sibi ran to base for the oxygen but she pulled through. Day two must be a challenge frequently as The Green Machine had set up a ‘sleeping tent’.

As per usual we overate (just couldn’t say no to the chicken,  pasta, bread or veg!) then waddled off into what could only be described as… Scotland!

After we arrived at camp, everyone took a siesta. A few of us made it up at 17:30 for snacks and chats with Sibi. I liked how passionate he was about his country and the positivity he showed for the company and the treatment of its employees.

Cena (dinner) arrived and the last supper did not disappoint.

The chef baked us a cake! Seriously, I can’t bake a cake in a kitchen with gas and electricity at sea level never mind on a mountain with a stove. Absolute genius.

Day 3: Quenayoc – Pumahuacuanca – Ollantaytambo – Aguas Calientes

Day three is a breeze. We were allowed a long lie (6am coca call), ate an omelette and the best apple pie I’ve ever tasted for breakfast. We then trekked with a short ascent then an easy descent down to 2800m.

The walk only took 3.5 hours before we were lunching again. Once ‘tipgate’ was resolved we said goodbye to the immense Green Machine who rewarded us with an Alpaca Expeditions t-shirt.

Next, we bussed to Ollantaytambo.

The cute cobbled town is shadowed by many Inca terraces, some of which are still used for crops today. Sibi gave us a tour of the town and showed us how chicha (an alcoholic beverage) is downed (not suitable for gringos?) If you see a house with a red flag outside it, this indicates chicha (a kind of beer) is being served.

I’ve tasted the non-alcoholic version, chica morada, (ok to drink in cities), which was lush – this one didn’t look that inviting. The next stage of our tour to Machu Picchu is the train to Aguas Calientes.

The train to Machu Picchu Pueblo (also called Aguas Calientes) from Ollantaytambo takes 1.5 hours and Inca Rail serves a free beverage and snack which is a nice touch.

The journey follows the tropical forest and the Amazon River to the destination. On arrival at the hotel, we took a much needed hot shower and then dined together (all of this was included in the price of the trek).

Day 4: Machu Picchu

Machu Picchu day! Ready to see the 7th modern wonder of the world?

Lares trek to Machu Picchu

The 5am wake up was draining but worth it. We were up and out for 06:45 but back at the hostel by 7am as Craig forgot our passports. No passports, no entry to Machu Picchu! After the blip, we met the rest of the group and Sibi took us to the perfect photo opportunity spot.

It is difficult to comprehend that people made this city with their hands in the 15th century. The architecture and craftsmanship of the houses, terraces and temples are neat yet striking.

The Inca peoples ingenuity and relationship with nature served them well.

It’s sad to see that conflict (invading conquistadors) drove them out and disease killed the skill off and it’s easy to understand why the Incas are proud of their heritage.

Sibi’s three-hour tour of the city was extensive (the trip to Cusco’s Planetarium had given us a sound base knowledge of the Inca culture, recommended), afterwards we had free time to explore and then make our own way back to Machu Picchu Pueblo for 2pm.

It really wasn’t our day, the llama wouldn’t get a selfie with us (Steph’s picture was a banger), Craig smashed his iPhone screen, I lost my ticket (the nice office employees printed me another) and the bus back to town was going to cost us 80 soles / £17 each.

So we decided to take advantage of our misfortune and the one hour of sunshine to trek the path back to Machu Picchu Pueblo. The stairs took 35 mins then the ascent (seriously, another hill?!) 25 mins.

After a pizza (20 soles / £4 each) and a glance at the market, it was time for the train back to Ollantaytambo where Sibi and the Alpaca van collected us and dropped us back off where it all began in Cusco (near but not at our hostel).

It’s always really sad to break up the ‘family’ at the end of trips. You get comfortable with your team and it’s refreshing to speak to other people (no offence Craig)!

The four-day trek was exceptional and the weather did not drown our spirits. We had some of the best food that we have tasted in Peru, hats off to The Green Machine. Read this alternative viewpoint – why I hate Machu Picchu.

Alpaca Expeditions Review

Alpaca Expeditions were recommended by two other travellers because of their fair wages and treatment of locals. They are not the cheapest or the most expensive but they do cater for their mostly Western guests well and make the two nights of camping as comfortable as they can be.

The only dampener is the whole tip situation because it doesn’t quite add up with the perception that they treat their workers well. If they do, why is on the travellers who are spending a large part of their budget on the trek to Machu Picchu to bump it up?

The additional charges through PayPal and Visa are also a sting since our daily budget for this trip was £45 per day (for two).

Was the Lares Trek to Machu Picchu hard? Not really. Was it worth it? Yes! Was it my favourite Peruvian hike? No! The Colca Canyon was! Be safe fellow travel lovers, remember to acclimatise before you arrive in Cusco and be armed with quality coverage travel insurance (check quotes here).

Lares Trek essentials
Don’t forget your travel insurance
Check out this review of hostels in Cusco
Click here for the best hotel rates
Here’s our list of what we can’t travel without
Don’t want to hike? Read our guide to 14 other ways to get to Machu Picchu

Like it? Pin it!

Lares Trek to Machu Picchu Peru

Are you going? Questions? Fire away…
Have you been? What was your experience like?

Colca Canyon Trek – The Essential Hiking Guide

Colca Canyon Tours

Just wait until you experience the sweeping beauty of the Colca Canyon, Peru which sits on the Colca River. The Colca Canyon trek is often viewed secondary to the famous hikes to Mach Picchu but once you have trekked with condors swooping above, you will agree that this hike is incredible in its own right. We (Gemma and Craig) opted for the 3 day guided hike but others complete it in 2 days, with the aid of a guide, or unguided, with ease. Colca Canyon tours also leave from Arequipa for those who don’t want to miss out but can’t trek due to ability or time constraints.

Colca Canyon Trek, Peru

Mirador Cruz del Condor

Like many great trips, it’s not just about the destination. Arequipa to the Colca Canyon takes around 3 hours to travel via tour bus and the start is early, 3 am to be precise. Luckily, our hiking guide, Juanito (which means little John he informs us), lays off the chat and lets us rest our heads for a few hours before we fill up on breakfast at Chivay (3,650 meters above sea level ) then on to the touristy Cruz del Condor. The viewing point, Mirador Cruz del Condor, is one of the popular stops for tours so you do need to elbow your way through crowds while staying away from the edge. The drop is 1200m deep but don’t just look down – check out the sky for the condors circling.

Note: The is an entry fee of 70 Peruvian soles each paid at the start of the canyon.

Colca Canyon Tours

Colca Canyon hike day 1

The trek for the first half of day 1 is mostly descent into the Canyon which starts at 3287 metres above sea level. To put this into perspective, the peak of the highest mountain in Great Britain (Ben Nevis) is only 1345. The landscape swallows you up and the blue, green and orange tones of the canyon are striking. The terrain is rocky, it can get tiresome of the knees but the pace is steady and the chat is electric. Juanito is honestly the best hiking guide I’ve trekked with. He shares stories of life growing up in Peru, trying to get his parents to recycle and the bad side of tourism in South America.

The Peruvian national drink, Inca Kola is consumed at the bridge before we make our ascent. Did you know that only two countries in the world where Colca Cola does not dominate supposedly – Peru (Inca Kola) and Scotland (Irn Bru, of course!) In the afternoon, going downhill niggles the knees and going arriba (up) steals my breath. If you really struggle, a taxi is on hand… as in a furry taxi donkey (which a member of our team did use on day two). Day one concludes with lunch, an unofficial walk with Juanito, dinner and a disturbed sleep in a cute cement house (damn cricket on the roof!)

Colca Canyon Peru | Hikes from Arequipa

Swimming in a Canyon

Day two of the Colca Canyon trek starts at 7am with an ascent along the water, passing interesting smelling plants (smell like weed, we’re told that it’s not marijuana). There are many ‘makeshift’ shops on the road for snacks. We spot caged guinea pigs but Juanito reassures us that they are not lunch. Cuy is not served on this Colca Canyon hike! Did you try it on your trip to Peru? Tell me in the comments below.

An easy afternoon walk takes us to our abode for the night – Paraiso Las Palmeras Lodge at Oasis Sangalle, sounds like paradise eh?

This lodge has a swimming pool and happy hour with mojitos.

Warning: Happy hour is not the best idea since you have a 5am start the next day to tackle the massive climb out and up the Canyon before the sun takes to the sky.

Colca Canyon sunrise

Trekking Out of the Colca Canyon

Day three is quite tough. It’s pretty much all up hill (you are climbing out of the Canyon) and I think Craig unofficially made this a competition as we completed it in 2 hours and 15 minutes, the second/third (debatable) couple to reach the summit. The last leg of the trek was pleasurable; food and hot baths! You’ve never seen a group of people so happy to see eggs for breakfast.

Colca Canyon Tours

You 100% can trek in/down/out/up of the Colca Canyon without a tour, however, I was thankful of joining one as our group (on the whole) was made up of funny, intelligent and inspiring travellers. 3 day/2 night hiking tours start at around £170 for 3 days hiking. This includes experienced bilingual guide, accommodation, meals and accommodation collection/drop off.

You can mostly rely on treks to meet like-minded ‘chévere’ (cool) people. We stole lots of ideas for Bolivia (next!) from Stefan, Sandy, Rose and Julien. We were also ashamed of how terrible our Spanish was so promised to sign up for  Spanish school in Cusco. But what really makes a tour is (the weather) and your guide. Juanito – I’ve honestly never met anyone like him. Craig still wakes up with ‘vámonos chicos’ (let’s go boys!) ringing in his ears. He is an asset to the company and Peru’s tourism.

Colca Canyon hike

Colca Canyon 2 Day Trek

We opted for the 3-day tour as we were a tad concerned about the state of our fitness after quite a heavy party session which kicked off our trip! However, there is a 2 day Colca Canyon trek which follows the same route, at a faster pace.  We met lots of able backpackers who completed this with no stress, and one who was pretty sick after it!

Colca Canyon Altitude

This trek around the Colca Canyon is highly recommended for those on their way to trek to Machu Picchu. Colca Canyon elevation can reach 4800 meters (15,800 ft) so it is excellent training to help avoid altitude sickness during your next trek to the seventh modern wonder of the world as the Lares Trek reaches highs of 4650m /15,255.

The Colca Canyon trek has taught me not to create preconceptions about trips. It is up there (literally) with the Lares Trek to Machu Picchu!

Colca Canyon Weather

Visitors have more chance of sun from May-August but average temperatures stay around 15 degrees for most of the year. There is more chance of rainfall at the start from January to April. We visited in April and experienced one downfall which was during our relaxing afternoon by the swimming pool at the Colca Canyon Oasis annoyingly.

Have you been to Peru?

Colca Canyon Trek Peru

Would you like to go?

West Highland Way Accommodation List (Review): Where We Stayed

Kingshouse Hotel West Highland Way Accommodation

Scotland’s West Highland Way is a 96-mile trek which starts in sunny Milngavie, just outside of Glasgow and concludes in Fort William. I had the pleasure of hiking it over six-days with friends to celebrate a year of 30th birthdays. The full story starts here.

If you are reading to find out about West Highland Way accommodation, this guide details where we stayed each night with additional options for those West Highland Way camping/or struggling to get a reservation.

Do consider the delightful Scottish weather if you plan to camp!

Not into camping or carrying your pack? West Highland Way baggage transfer is available and the hotels and hostels are accustomed to this.

Companies meet you at your starting point to collect your luggage then drop it off at your accommodation each day.

Naturally, you will need to pack a day bag with waterproofs and snacks, read our packing list guide for more.

Planning your WHW adventure? Start here for our full guide.

Kings House Glencoe West Highland Way Hotels

West Highland Way Accommodation List

The great thing about this hike is that there are so many different types of accommodation.

Most stops have a hotel, guest houses, bed and breakfasts (B&Bs), apartments, hostels, and campsites.

Some even have hot tubs so you can soak your screaming muscles at the end of the day!

This guide will include all of the mentioned types of accommodation to cater for all kinds of hikers.

Day 0: Milngavie

The official start of the West Highland Way is located 7 miles outside of Scotland’s biggest city, Glasgow, in a town called Milngavie (Mill-guy).

Many WHWers start their adventure from Glasgow, taking the train from the city.

However, some prefer to get a good night’s sleep in Milngavie and set off early to ensure that they arrive in Balmaha to see the beauty that is Conic Hill.

Milngavie Accommodation

Milngavie has an affordable Premier Inn budget hotel.

Unfortunately, are no hostels in Milngavie, however there are a couple in Glasgow. Check out the full list here.

The West Highland Way Milngavie Start

Day 1: Balamaha Accommodation

Balamaha is a beautiful village on the eastern shore of Loch Lomond.

You will find this scenic spot at the descent of Conic Hill after the first day of the West Highland Way hike.

The Oak Tree Inn is a favourite for food and the well-deserved pint at the end of day one.

Please note, wild camping is now illegal around Loch Lomond’s west shores.

Bed and Breakfast

Bay Cottage was the best West Highland Way bed and breakfast, highly recommend. Photos don’t do it justice.

  • Cost: £90 per room
  • Pros: Large room to ourselves (sleeps four, there are smaller rooms), breakfast choice (hot or continental), the packed lunch for £6 and the hot tub! Scones and tea on arrival and drying facilities for clothes
  • Cons: None

Balmaha Hotel

Oak Tree Inn is a popular hotel for food and drink.

  • Cost: Under £100
  • Pros: Nicely decorated rooms, rooms above Inn or cottages available, restaurant, shop, views!
  • Cons: On the more expensive end of the scale, budget depending
  • Read reviews at TripAdvisor

Balmaha Hostel

Balmaha bunkhouse is currently closed for renovations.

  • Cost: TBC
  • Pros: Good for large groups (can hire out full dorm – stags/hens welcomed), social area, kitchen, cereal breakfast included
  • Cons: Weak WiFi (who cares?)
  • Notes: Dog-friendly for additional £5 (Bunkhouse only) / No cards, cash only

Balmaha West Highland Way Walk


Day 2: Inverarnan Accommodation

The main attraction around Inverarnan is the 300+-year-old pub/restaurant/hotel, Drovers Inn.

Each of the 15 rooms differ and the hotel caters for solo travellers, double rooms, families and a jacuzzi room.

Room 6 may be of interest to ghost hunters!

  • Cost: Starting at £35 (single low season) to £260
  • Pros: The restaurant food is nice, the entertainment was a laugh
  • Cons: Nice rooms but cold, shared bathrooms – not for everyone (ensuite is available), catering staff spoke limited English (requests not met)

Day 2: Tydnrum Accommodation

The next stop, Tyndrum, is a popular alternative second night and has more to offer accommodation wise.

Tyndrum Hotels

Muthu Ben Doran Hotel is located on 7-acre grounds within Loch Lomond & The Trossachs National Park.

  • Cost: Under £90 for double room with ensuite
  • Pros: Beautiful location, features a restaurant, bar, breakfast
  • Cons: Rooms a tad run down according to guests

Tyndrum Lodges

Guests love Tyndrum Lodges and find it hard to fault it!

  • Cost: Under £100 for double room with ensuite
  • Pros: Location, takeout breakfast
  • Cons: Guests love these lodges!

Tyndrum Campsites

There are two campsites in Tyndrum that offer a variety of accommodation.

Campsite: Beinglass

  • Cost: £8 per person, no refunds, 100 pitches
  • Info: Campsite has shower facilities, an on-site bar/restaurant

Campsite: By the Way Hostel and Campsite

  • Cost: £10 per person, 2 man tent max
  • Pros: Huts, cabins and dorms also available
  • Cons: Does get waterlogged, staff will try accommodate you in hut

Day 3: Bridge of Orchy Accommodation

Bridge of Orchy, or Drochaid Urchaidh in Gaelic, is a hamlet or village in the Argyle and Bute region of Scotland.

There are limited facilities in Bridge of Orchy (as in, there are none).

Hikers not walking the West Highland Way may be interested in Beinn Dorain and Beinn an Dothaidh.

You will want a decent night’s sleep as the next leg over Rannoch Moor can be brutal if windy.

Bridge of Orchy has a bus route that goes from Glasgow through to Kingshouse, Glencoe and a train station. It is the best connected stop during the WHW.

However, the area is expensive and limited to one restaurant and the Bridge of Orchy Hotel.

Bridge of Orchy Hotel

A popular hotel surrounded by mountains and a river, the Bridge of Orchy Hotel is a hit with WHWers who don’t mind paying a bit more than a B&B and don’t want to camp.

The restaurant is also recommended by guests. I had a hot chocolate here as I waited to get the bus when I was injured.

  • Cost: £200 +
  • Pros: Restaurant, cosy, one of the upmarket West Highland Way hotels
  • Cons: A bit of the pricier scale, area is just expensive

Bridge of Orchy camping

There is no official camp site here but West Highland Way wild camping is allowed, as with any camping in Scotland follow the Scottish Outdoors Code.

Day 4: Kings House (Glencoe) Accommodation

Glencoe is one of my favourite spots in Scotland.

You really lose yourself to hills here which leave you feeling inferior.

Look out for the friendly, photogenic deer who hang outside of the Kingshouse Hotel. Don’t feed them please.

Kingshouse is a popular stop for food and a drink.

Kingshouse Bunkhouse West Highland Way

Glencoe Hotel

The Glencoe Inn is a striking hotel located under the Pap of Glencoe and surrounded by the beautiful Ardgour Hills.

  • Cost: £200+
  • Pros: On-site restaurant and bar
  • Cons: Pricier side of WHW accommodation

Hostels at Glencoe

Glencoe Independent Hostel is where we stayed. They can help organise a pick up and collection from Kingshouse approx. £15 per person.

The building is an old croft and it has a drying room which is ideal.

The hostel has big rooms for groups to reserve in full.

  • Cost: £200+ for groups
  • Pros: Large room (one room for all six of us), breakfast packs adequate, drying room, codes for security, shared showers hot
  • Cons: Those fire doors, slammed all night
Deer with one antler Kingshouse

Day 5: Kinlochleven Accommodation

I really enjoy spending time in Kinlochleven.

I’ve stayed over twice to hike and have also spent the day indoor ice hiking and climbing.

It’s such a great spot for outdoor fans.

Unfortunately, neither of the accommodation options I stayed at are taking bookings. Here are some alternatives.

Kinlochleven Pods

A popular choice for visitors and WHWers, Coe Pod glamping huts have ensuite bathrooms to ensure a comfortable stay.

  • Cost: £120
  • Pros: Comfortable, private, ensuite
  • Cons: Only one chalet so books out fast

Day 6: Fort William Accommodation

You’ll never be so thankful to see a town centre! Fort William is the final stop on the West Highland Way hike.

Some hikers head straight to the train station to get home, others stick around for a few nights to chill or hike Ben Nevis!

Fort William Hotels

There are over 20 hotels in Fort William to choose from, catering for every budget and type of traveller.

The Garrison is a popular with guests for its modern decor, bar, central location and friendly staff.

  • Cost: £350+
  • Pros: Guests love it, parking for hikers meeting family
  • Cons: Luxury end of the hotel market so pricier, treat yourself!

The Distillery Guest House has comfortable rooms, great breakfast and is located on the banks of the River Ness.

  • Cost: £150+
  • Pros: Scenic location, breakfast, rooms
  • Cons: 10 mins walk to town

Fort William Hostels

The Glen Nevis Youth Hostel is situated at the foot of Ben Nevis so an ideal base for those looking to hike Scotland’s highest Munro Ben Nevis!

  • Cost: £170 double room
  • Pros: Location for hikers
  • Cons: 45 mins walk to Fort William centre

There are currently 5 hostels in Fort William. Click here to read reviews.


Save for later! Pin to your WHW planning board.

Planning to hike the West Highland Way in Scotland? Here's the ultimate list to accommodation including hotels, b&bs, guest houses, hostels, apartments and campsites.

You May Also Like Our Other WHW Guides